Summary
- Building a home batting cage allows young players to practice consistently, improving their skills.
- One of the main advantages is convenience; players can practice anytime without having to go to a facility.
- Over time, it is more cost-effective than renting space at sports facilities.
- Before starting construction, it’s important to plan properly, including assessing the space and checking zoning regulations.
- Choosing the right materials, such as PVC or metal for the frame and a durable net, ensures safety and longevity.
The Benefits of Building a Home Batting Cage
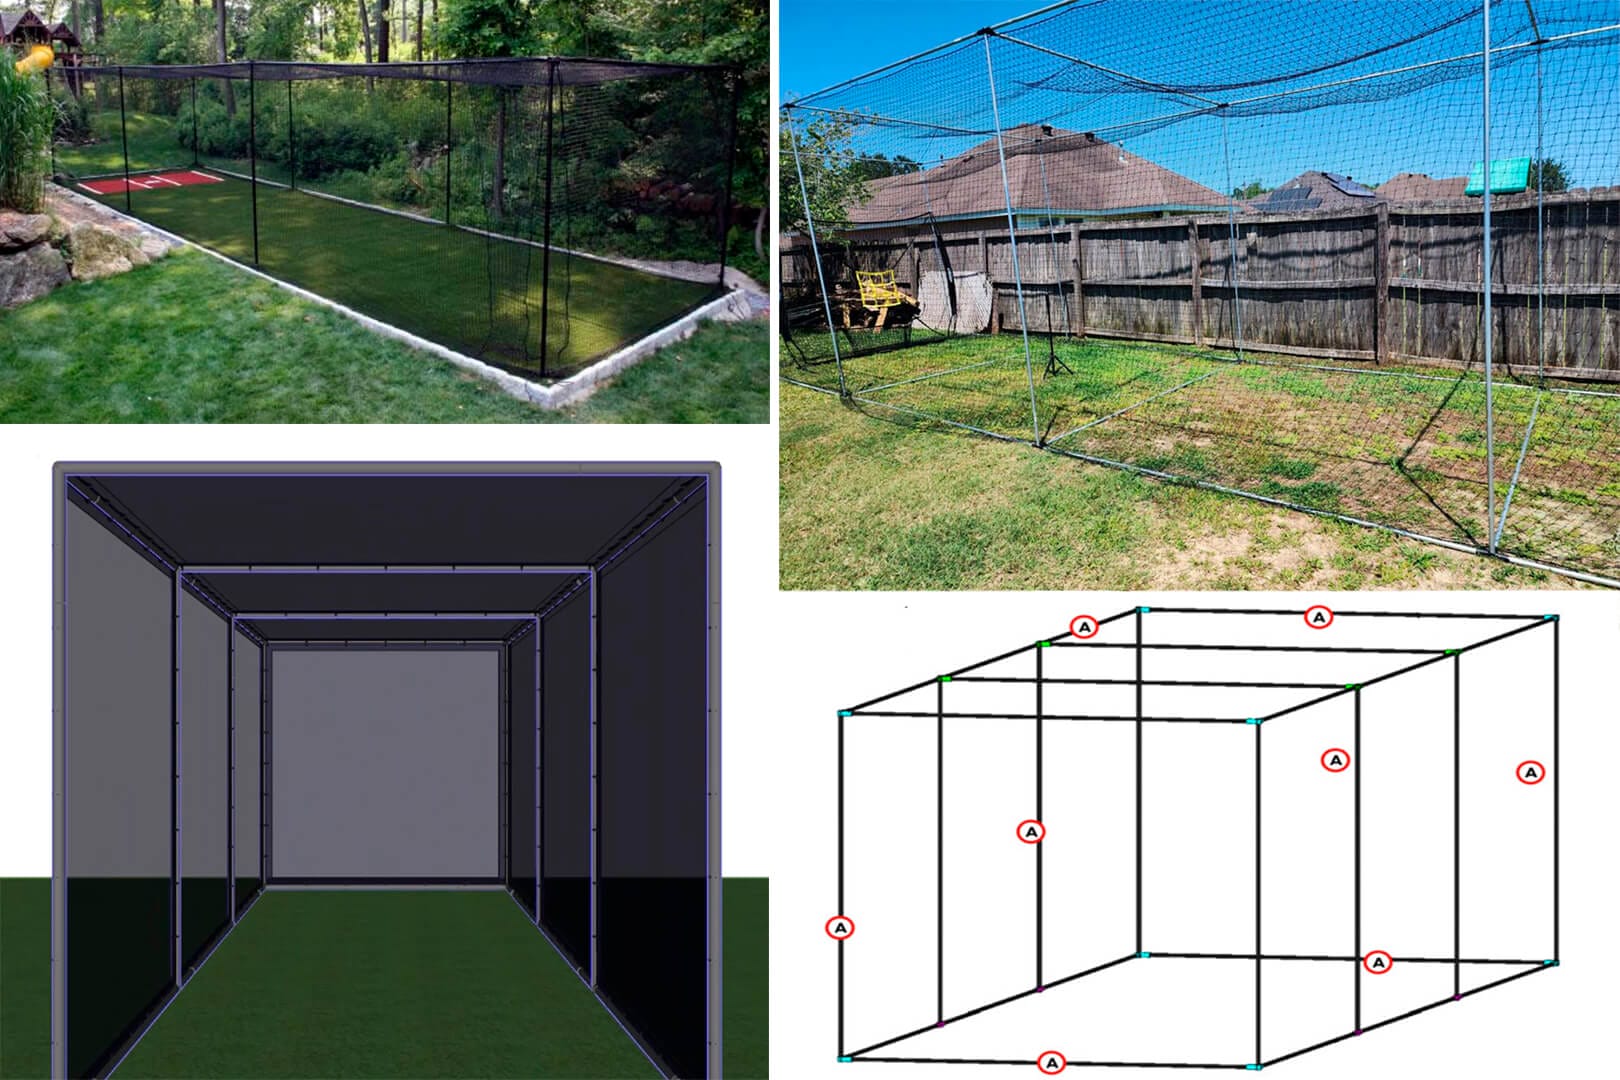
Building a home batting cage can turn your backyard into a practice haven for young baseball and softball players. It provides a private, distraction-free space where they can perfect their skills. Plus, it eliminates the need to wait for a turn at busy public batting cages. This dedicated space allows for consistent practice, which is crucial for improving in any sport.
Enhanced Practice Possibilities
With a batting cage in your backyard, practice can take place anytime it suits you. Whether you want to have a short session before supper or a lengthy practice on the weekend, the cage is always available. Regular practice is crucial for improving skills, and having a home batting cage makes it simple to incorporate practice into a hectic schedule.
Easy Access and Comfort
Think about not having to gather all your equipment, drive to a training center, and wait for a free spot. You just need to walk a few steps into your backyard with a home batting cage. This convenience can encourage more regular practice, as it removes the obstacles of time and travel.
What’s more, it’s a fantastic way to get the whole family involved. Parents can pitch balls, siblings can play, and everyone can have fun together while supporting the budding athlete in the family.
Saving Money in the Long Run
Building a batting cage at home does require an initial investment. However, it can save you money over time. Renting time at a sports facility can get expensive fast, especially if you’re practicing frequently. By investing in a home setup, you can eliminate those recurring costs and have a permanent place to practice.
Next, we’ll cover the crucial steps in the planning process to make this dream a reality.
Planning is Key
Before you start buying materials and tools, make sure you plan your project carefully. Proper planning will make sure your batting cage is safe, works properly, and meets any local laws. Here are the things you should think about:
Checking Out the Space and Spot
Initially, you should check out the open space in your backyard. You need to measure the area to make sure it’s big enough to fit a batting cage. You’ll ideally want to have enough space for the batter to swing without any restrictions and for the ball to fly without hitting any nearby structures. To improve your swing, consider using swing training aids that are designed for young players.
Don’t forget to think about the ground surface too. It’s best to have a flat, level area for a stable structure. If the ground isn’t level, you might need to level it before you start building.
Getting to Know the Zoning Laws
First and foremost, get in touch with your local government to learn about zoning laws. Some places have rules about constructing buildings in residential areas. It’s best to understand these things ahead of time to prevent any legal problems later on. For more insights, you might find this guide on navigating the pitfalls of building your own backyard batting cage helpful.
Reach out to your local zoning office or visit their website to find out about the permits and regulations that apply to your area. For additional resources, you can explore various youth baseball and softball positioning drills to enhance your game setup.
Choosing the Perfect Size and Design
After you’ve grasped the area and rules, it’s time to choose the size and design of your batting cage. A typical backyard batting cage is typically 55 to 70 feet long, 14 feet wide, and 12 feet tall. However, the size can be adjusted based on the available space and the age of the players.
Consider the design too. Do you want a simple, straight cage, or do you want to include a pitching area or backstop? Knowing these details will be useful in the next steps when you start collecting materials and building the cage.
Collecting the Essential Materials and Tools
Once you have a comprehensive plan, you can start collecting the materials and tools necessary for the build. Choosing the correct materials will guarantee the batting cage is safe and long-lasting.
Deciding on the Best Frame Material: PVC or Metal
One of the first choices you’ll have to make is deciding on the material for the frame. PVC and metal are the most popular choices. Both have their advantages and disadvantages:
|
Material |
Advantages |
Disadvantages |
|---|---|---|
|
PVC |
Light, simple to put together, affordable |
Not as sturdy, might not hold up in strong winds |
|
Metal |
Extremely sturdy, weather-resistant, lasts a long time |
Heavier, pricier, needs more tools |
Think about the weather in your region and how frequently the cage will be used when deciding. If you need something that will last and you have the money, metal could be the way to go.
Choosing Strong Netting for Protection
Safety is paramount, and choosing the correct netting is a key part of that. The netting ensures that the balls stay within the cage, safeguarding both the players and any nearby buildings or individuals. There are several types of netting materials to choose from, but polyethylene and nylon are the most popular. Polyethylene is resistant to UV rays and is perfect for outdoor cages, while nylon is stronger and lasts longer, making it perfect for high-impact use. For more insights on improving your setup, check out these tips and techniques.
Don’t forget to think about the thickness of the netting. A thicker netting will be more durable and offer better protection. A thickness of 2.5mm to 3mm is usually suggested for backyard batting cages, making sure that the netting can handle regular use and tough weather conditions.
What Tools You’ll Need to Build Your Batting Cage
Building your batting cage requires a few crucial tools. Here’s a list of what you’ll typically need, including perfect swing training aids for enhancing your practice sessions.
Here are the tools you will need:
- Tape measure: You’ll need this to get the exact measurements of your space and materials.
- Saw: If you’re using PVC, a handsaw or PVC cutter will do the trick; for metal, you’ll need a hacksaw or power saw.
- Drill: This is for making holes in the frame and securing parts together.
- Wrench set: You’ll need this to tighten bolts and make sure your frame is secure.
- Level: This is to ensure your frame is even and stable.
Being prepared with the right tools will make the building process go more smoothly and efficiently. Now, let’s talk about how to actually build and design the batting cage.
Building and Designing Steps
There are a number of steps to take when building a home batting cage, each one important for making sure the structure is safe and works well. By taking a systematic approach, you can create a batting cage that suits your needs and will last for a long time.
Firstly, begin with a strong foundation. A secure base is crucial to ensure the cage remains upright and safe during use. For additional tips on improving your setup, check out these perfect swing training aids for kids.
Building a Sturdy Base
It’s crucial that your batting cage has a solid base for support. If your yard’s ground isn’t firm enough, you may need to create concrete footings for the frame. This is especially true if your frame is made of metal, as it’s heavier and needs a strong anchor.
If you’re looking for a less complicated setup using PVC, you can use stakes driven into the ground for sufficient support. Make sure to space them out evenly and ensure they’re driven deep enough to keep the structure stable.
Constructing a Sturdy Frame
After the foundation is prepared, it’s time to build the frame. Start by putting together the base, making sure it’s level and square. If you’re using PVC for the frame, use elbows and T-joints to connect the pipes, and secure them with PVC glue for extra durability. For more advanced tips, consider exploring batting performance tips to enhance your practice sessions.
When you’re working with metal, make sure to bolt the pieces together securely. It’s very important to follow the manufacturer’s instructions exactly to make sure the frame is stable. Make sure all parts are secured and that the frame is aligned correctly.
Putting Up the Netting for Maximum Protection
Once the frame is ready, it’s time to put up the netting. Begin by fastening it to the top of the frame, letting it hang down evenly on all sides. Use zip ties or clips to secure it, making sure it’s tight and without any slack.
Always make sure to check the netting for any signs of damage or wear. Small holes can get bigger quickly, so fix them as soon as possible to keep the cage safe.
Adding Extra Features such as Backstops
If you want to upgrade your batting cage, you might want to add features like backstops or pitching targets. A backstop can save the netting from too much wear and provide a target for pitchers to aim at. It also provides an extra level of safety by catching any balls that are missed.
You can make these features from heavy-duty tarp or extra netting, and you should attach them securely to the frame. If you customize your cage in this way, your practice sessions can be more productive and enjoyable.
Thinking About Safety
Safety should be a key concern when you’re building and using a batting cage. It’s important to install it correctly, keep it in good condition, and always use protective equipment.
Why Correct Installation Matters
Correct installation is crucial to keep the cage steady and secure while in use. Always adhere to the guidelines given with your materials and verify all connections. An incorrectly installed cage can fall apart or turn into a danger, so spend the necessary time to do it correctly.
First and foremost, ensure the cage is positioned at a safe distance from windows, fences, or other structures to avoid damage from errant balls.
Keeping Up with the Upkeep
Just like you need to take care of your baseball equipment, you also need to take care of your batting cage. This means regularly checking the frame and netting for any signs of damage. This could be rust on the metal parts or fraying on the netting. If you find any loose bolts or connections, make sure to tighten them. If you find any damaged parts, make sure to replace them.
Maintaining the cleanliness of the cage and ensuring it is free from debris will help prolong its lifespan. A simple hose down can get rid of any dirt and dust that have built up over time. For more tips on keeping your equipment in top shape, check out our guide on perfect swing training aids for kids.
Keeping Players Safe with Protective Gear
Lastly, always make sure that players are wearing the right protective gear when they’re practicing in the batting cage. Helmets, gloves, and the right shoes can help prevent injuries and make practicing safer.
Ensure players adhere to safety rules and remind them of the need to stay vigilant and alert when in the cage. By placing safety first, you can foster a positive and effective training environment for young athletes.
Keeping Your Batting Cage in Tip-Top Shape
It’s important to take good care of your home batting cage to keep it safe and usable for years to come. Not only does regular maintenance extend the lifespan of your cage, but it also improves the quality of your practice sessions. Here are some important maintenance tips and ways to upgrade your setup for more advanced training.
Regular Cleaning and Inspection of the Netting
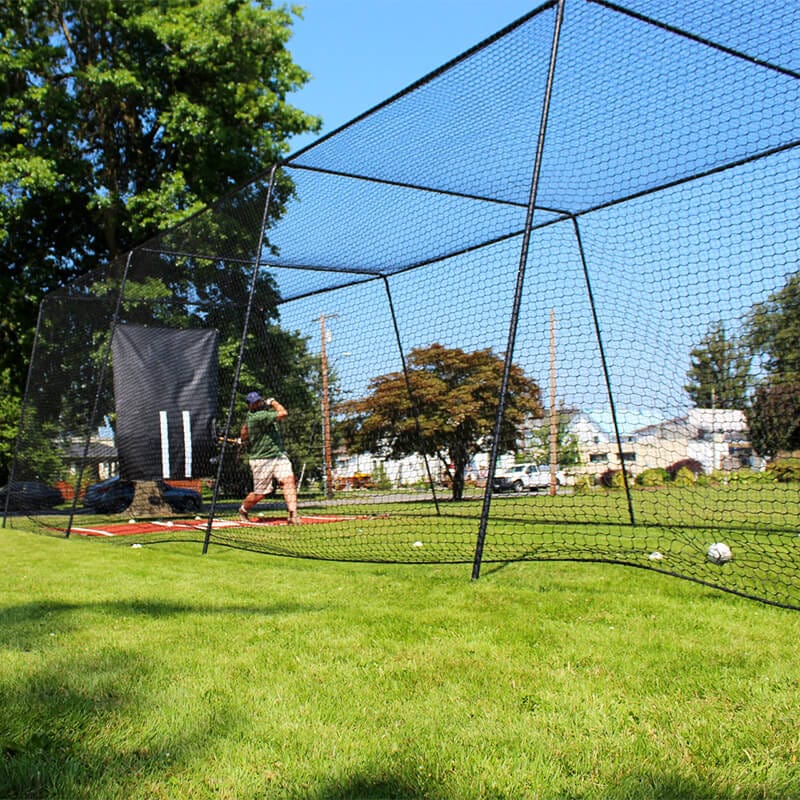
Begin with regular cleaning. Dust and debris can build up on the netting and frame, which can cause wear and tear. A quick rinse with a garden hose can keep the cage clean and extend the life of the materials. For more detailed guidance, check out top tips for designing your home batting cage. Get into the habit of checking the netting regularly for any signs of damage. Look for holes or frayed edges and fix them right away to ensure safety.
Make sure the netting is tight. If it’s loose, balls can bounce around in ways you don’t expect, and that can be dangerous. You can stop this from happening by tightening the netting every so often.
Enhancing Your Batting Cage for Higher-Level Practice
As your young players become more skilled, you may want to enhance your batting cage to provide more challenging practice opportunities. Incorporating pitching machines or adjustable pitching targets can mimic real game situations and help increase reaction speed. These enhancements can make practice more fun and productive.
If you’re planning on having practice sessions that go on into the evening, you might want to think about installing some lighting. This is not only important for visibility but also for safety. Plus, it means you can keep practicing for longer, especially during those months when the days are shorter.
Adjusting for the Seasons and Storing Your Cage
The changing seasons can affect the state of your batting cage. In the winter, particularly in places with severe weather, it may be a good idea to take down the cage or cover it with a tarp to shield it from snow and ice. This measure can help avoid rust and other damage caused by the weather.
If you’re using a portable cage, you might want to store it in a shed or garage if you’re not going to use it for a while. This will help protect the materials and make sure the cage is ready to go when the season starts up again. For more tips on maintaining your equipment, check out these tips and techniques for improving kids’ baseball skills.
Common Questions
It’s normal to have a few questions when it comes to building and maintaining a home batting cage. For additional insights on improving your setup, consider exploring tips and techniques to improve kids’ baseball skills to help you get the most out of your setup.
What’s the best size for a kids’ batting cage?
Usually, the best size for a kids’ batting cage is somewhere between 35 to 55 feet long, 12 to 14 feet wide, and about 10 to 12 feet high. This size gives enough room for young players to practice their swings without feeling too confined. For more tips on improving kids’ baseball skills, check out this helpful guide.
What steps can I take to make the cage safe for young players?
Keeping the cage safe means installing it properly and maintaining it regularly. Ensure that the frame is solid and all connections are secure. Use top-quality netting that can effectively contain balls. Make sure players wear protective gear and follow safety rules during practice.
What are some inexpensive materials I can use?
If you’re looking to save money, PVC is a great option for the frame, and polyethylene netting is a good choice for the net. Both of these materials are cheap and easy to handle, which makes them perfect for do-it-yourself projects. To save even more money, keep an eye out for sales or discounts at your local hardware store.
How frequently should you replace the netting?
The netting should be replaced every couple of years, or earlier if you notice substantial wear and tear. Regular checks will help you determine when it’s time to replace it. Areas of high impact may need to be replaced more often to maintain safety.
What zoning laws do I need to know before building a batting cage?
Before building your batting cage, you should check with your local zoning office to understand the specific zoning laws in your area. Some areas may require permits for building structures, while others may have restrictions on size or placement. Knowing these regulations will help you avoid any potential problems.
Building a home batting cage can be a fantastic way for young baseball and softball players to improve their skills. By practicing regularly, players can enhance their batting techniques and gain confidence. To make the most of your home setup, consider incorporating various drills and exercises. For example, understanding the difference between front toss and soft toss techniques can provide valuable insights into effective training methods. With the right approach, a home batting cage can be an excellent investment in a young athlete’s development.

Leave a Reply