Key Points
Correct pitching mechanics are vital for injury prevention and performance improvement.
Foot placement, hand hold, and hip spin are important components of a good pitching technique.
Regular practice and targeted exercises can help young players improve their pitching mechanics.
Keeping track of pitch counts and ensuring sufficient rest are key to preventing injuries.
Diet and mental health significantly affect a young player’s overall performance and health.
Top Tips for Young Player’s Pitching Mechanics & Injury Prevention
The Importance of Correct Pitching Mechanics
Correct pitching mechanics are the bedrock of a successful baseball career. They not only help young players throw with more precision and power but also lower the risk of injuries. When you have the correct mechanics, every part of your body works in unison, making your pitches more efficient and your arm less likely to be strained.
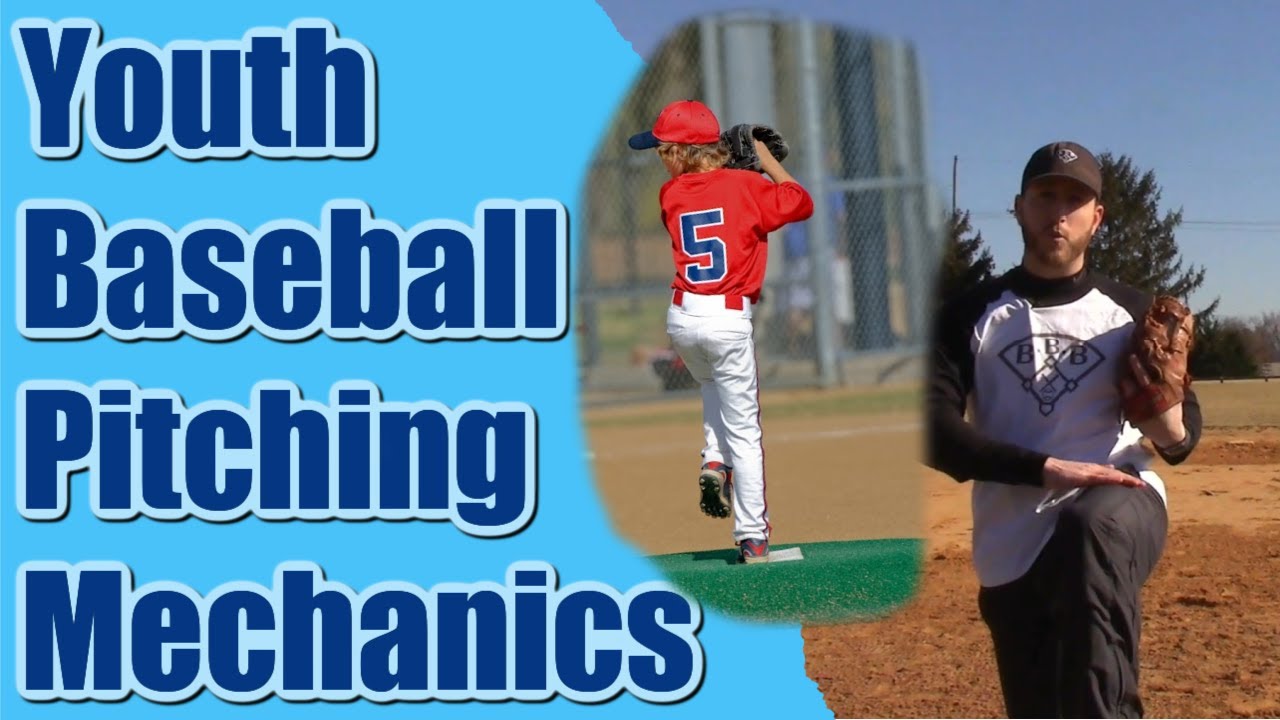
“The secret to a long and successful pitching career is good mechanics. They not only enhance performance but also prevent injuries.” – Baseball Coach
The most crucial thing is to learn these mechanics early on. This lays the groundwork for future growth. Without a solid foundation, you could develop bad habits, which could lead to poor performance and possible injuries later on.
Understanding Pitching Mechanics
It’s crucial for young players to understand the fundamentals of pitching mechanics. This means knowing how to place your feet, hold the ball, and turn your hips and shoulders during the pitch. Here’s a breakdown of each part:
Placement of the Feet
The perfect pitch begins with the feet. Start with your feet spread apart at shoulder-width, and your toes aimed at home plate. As you start your wind-up, take a step back with the foot that you don’t throw with to generate momentum. For more tips on preventing injuries, check out this guide on preventing pitching injuries.
As you step forward, try to have your front foot land in a straight line with home plate. This will help you keep your balance and direct your energy towards the target.
How You Hold Your Hand and Position Your Arm
The way you hold the ball can have a big impact on your pitch. A common four-seam fastball grip is when you place your index and middle fingers across the seams, with your thumb underneath for support. This grip gives you the most control and speed.
For your arm placement, it’s best to keep your elbow at the same height as your shoulder or a little higher when you’re throwing. This placement helps take some of the stress off your arm and makes for a smoother, more powerful pitch.
Twisting Your Hips and Shoulders
When it comes to pitching, your hips and shoulders are essential for power and precision. You should begin by twisting your hips towards the home plate as you stride forward. After that, quickly twist your shoulders, bringing your throwing arm over the top.
When you coordinate these actions, you can optimize the power behind your throw while keeping control. Keep in mind, the strength comes from your whole body, not just your arm.
Enhancing Your Pitching Techniques
When you’ve got the fundamentals down, it’s time to concentrate on honing your techniques. Regular practice and targeted drills can make a world of difference. Here are some drills and exercises to assist you in perfecting your pitching form: A Parents Guide to Youth Pitching and Arm Care.
Exercises to Improve Mechanics
Add these exercises to your practice schedule to improve your mechanics:
Mirror Drills: Stand in front of a mirror and go through your pitching motion. This allows you to see your form and adjust as needed.
Wall Drills: Stand next to a wall and practice your arm motion without touching the wall. This helps you keep your arm path correct.
Balance Drills: Stand on one leg and go through your pitching motion. This drill helps with stability and coordination.
“Working on specific drills allows young players to fine-tune their mechanics and build muscle memory.” – Baseball Trainer
Balance Exercises
Balance is key to effective pitching. Here are some exercises to help improve your balance:
Single-Leg Stands: Try standing on one leg for 30 seconds, then switch to the other leg. Do this several times.
Bosu Ball Squats: Squat on a Bosu ball to challenge your balance and strengthen your legs.
Yoga: Add yoga to your routine to improve overall balance and flexibility.
Arm Strength Drills
Building arm strength is key for a powerful pitch. Try these drills to build up your arm:
Exercises with Resistance Bands: Use resistance bands to perform exercises for your shoulder and arm, like external rotations and rows.
Long Toss: To build strength and endurance in your arm, practice long toss. Start at a shorter distance and gradually increase the distance as your arm becomes stronger.
Throws with Weighted Balls: Use a ball that’s slightly heavier to perform throws, focusing on maintaining the correct mechanics.
Consistent Practice
When it comes to improving pitching mechanics, consistency is key. Regular practice helps young players develop muscle memory, which is crucial for maintaining the correct form during games. You should aim to practice pitching at least three to four times a week. Each session doesn’t need to be long; even 30 minutes of focused practice can make a big difference over time. For additional tips, you can explore youth baseball throwing tips to develop a strong and accurate arm.

Furthermore, it’s crucial to mix up the intensity and focus of your training sessions. Some days should be devoted to honing mechanics and form, while others can concentrate on developing arm strength and stamina. This balanced approach aids in avoiding overuse injuries and keeps training sessions interesting. For more tips on developing a strong and accurate arm, check out these youth baseball throwing tips.
Developing a Regular Schedule
Creating a regular schedule is key for steady progress. Begin by identifying particular objectives for each training session. For instance, one day you may concentrate on refining your foot placement, while another day might be spent on improving your grip and arm movement.
Keep a record of your objectives and monitor your advancement. This not only keeps you driven but also lets you pinpoint the areas that require more focus. Keep in mind that betterment requires time and commitment, so adhere to your regimen and have patience with yourself. For additional guidance, check out these learning styles tips.
Building Up Your Throwing Distance
Slowly and progressively increasing your throwing distance is a great way to build your arm strength and improve your accuracy. Start with shorter distances and then slowly increase them. This way, your arm gets used to the increased workload without the risk of getting injured.
Start off by getting warm with some easy throws at a short distance. When you feel ready, move back a few feet and keep throwing. Keep doing this until you’re at the farthest distance you feel comfortable with. Always pay attention to how your body feels and don’t try to do too much too fast. For more information on the importance of consistent arm action, check out this article on consistent arm action.
Ways to Avoid Injuries
Preventing injuries is a crucial part of any pitching routine. Young athletes are particularly prone to injuries caused by overuse, so taking steps to safeguard their arms is essential. Here are a few important methods to avoid injuries:
Getting Ready for the Season
Before the season begins, it’s important to take steps to prevent injuries. Create a throwing program that slowly increases your arm strength and stamina. This program should involve a variety of throwing drills, strength training workouts, and days off for recovery. For more information, check out this injury prevention guide.
Beginning a Pitching Regimen
It’s crucial to have a well-planned pitching regimen to get your arm ready for the strain of the season. Start with easy pitching sessions and slowly ramp up the strength and length over a number of weeks. This method allows your arm to adjust to the additional workload without the risk of injury.
Developing Arm Power Over Time
Increasing arm power is a slow and steady process that demands dedication and regularity. Include a range of exercises in your regimen, like resistance band training, weightlifting, and plyometric exercises. These workouts aid in the strengthening of the muscles surrounding your shoulder and elbow, lowering the likelihood of harm.
Besides muscle building, you should also incorporate flexibility and mobility workouts into your regimen. Stretching and mobility exercises are essential in preserving the range of motion in your shoulder and elbow, which are key to successful pitching techniques.
Resistance Band Workouts: Perform exercises like external rotations, shoulder presses, and rows using resistance bands to build shoulder and arm strength.
Weightlifting: Incorporate exercises like dumbbell curls, tricep extensions, and shoulder presses to strengthen your upper body.
Plyometric Drills: Perform explosive movements like medicine ball throws and clap push-ups to build power and coordination.
During Season Care
Taking care of your arm during the season is just as important as pre-season preparation. Monitor your pitch counts, ensure adequate rest, and listen to your body to prevent overuse injuries. Here are some tips for in-season care: youth baseball throwing tips.
Count Your Pitches: It’s important to count the number of pitches you throw in each game and practice. This will help you avoid injuries that come from overuse.
Rest is Key: Resting your arm between pitching is crucial. It gives your muscles and tendons time to recover, which can help prevent injuries.
Use Ice Packs: After you finish pitching, put ice packs on your shoulder and elbow. This can help reduce inflammation and speed up recovery.
Why You Should Monitor Your Pitch Counts
If you want to keep your arm healthy, you need to monitor your pitch counts. This is especially important for young players, who are at risk of overuse injuries if they throw too many pitches without resting. Here are some general guidelines for pitch counts:
Ages 9-10: Limit to 75-85 pitches per week.
Ages 11-12: Limit to 85-95 pitches per week.
Ages 13-14: Limit to 95-105 pitches per week.
Ages 15-18: Limit to 10-12 innings per week and no more than 86 pitches per game.
Ensuring Adequate Rest
Rest is crucial for recovery and injury prevention. Ensure that you have at least 1-2 days of rest between pitching appearances, with more rest required as the pitch count increases. For pitchers ages 15-18, it’s recommended to have at least 4 days of rest between appearances.
In addition to that, ensure you get enough sleep and eat a balanced diet to aid in overall recovery and performance.
Resting After the Season
Once the season is over, your arm needs a break. This rest period allows for the healing of minor injuries and helps avoid serious damage. Here are the steps for a successful post-season rest: make sure to follow youth baseball throwing tips to maintain your arm strength during the off-season.
Correct Rest and Recovery
Pause from pitching for a minimum of several weeks to let your arm heal. During this break, concentrate on low-impact exercises such as swimming or biking to keep up your overall fitness without straining your arm. For more tips on how to develop a strong and accurate arm, check out these youth baseball throwing tips.
Conditioning After the Season
After you’ve had enough rest, start a conditioning program to get ready for the next season. This program should include strength training, flexibility exercises, and light throwing sessions to slowly build up arm strength and endurance again.
Strength Training: Keep up with your resistance band workouts, weightlifting, and plyometric drills to maintain and improve your strength.
Flexibility Exercises: Add stretching and mobility work to keep your shoulder and elbow’s range of motion.
Light Throwing Sessions: Begin with brief, light throwing sessions and slowly increase the intensity and length.
Injury prevention is a crucial part of any pitching program. Young players are particularly at risk for overuse injuries, so it’s crucial to take steps to protect their arms. Here are some important techniques to help avoid injuries:
Getting Ready for the Season
The time leading up to the season is key for preventing injuries. Begin by creating a throwing routine that slowly increases your arm’s power and stamina. This routine should incorporate a variety of throwing exercises, strength-building activities, and days off for rest and recuperation.
Beginning a Throwing Regimen
It’s crucial to have a properly organized throwing regimen to prepare your arm for the season’s demands. Start with light throwing workouts and slowly raise the intensity and duration over a number of weeks. This gradual method enables your arm to adjust to the increased workload without the danger of injury. For more on this, check out the importance of consistent arm action.
Slowly Developing Arm Strength
Developing arm strength is a slow and steady process that requires commitment and consistency. Add a mix of exercises to your routine, such as resistance band workouts, weightlifting, and plyometric drills. These exercises help to strengthen the muscles surrounding your shoulder and elbow, lowering the chance of injury.
Besides strength training, don’t forget to incorporate flexibility and mobility workouts into your regimen. Stretching and mobility exercises are key to maintaining your shoulder and elbow’s range of motion, a vital component of proper pitching mechanics.
Resistance Band Workouts: Use resistance bands to do exercises like external rotations, shoulder presses, and rows. This will help you build strength in your shoulders and arms.
Weightlifting: Strengthen your upper body by doing exercises like dumbbell curls, tricep extensions, and shoulder presses.
Plyometric Drills: Do explosive movements like medicine ball throws and clap push-ups to build power and coordination.
During Season Care
It’s just as important to take care of your arm during the season as it is to prepare before the season starts. To prevent overuse injuries, you should monitor your pitch counts, make sure you’re getting enough rest, and listen to your body. Here are some tips for taking care of your arm during the season:
Keep an eye on pitch counts: It’s important to keep track of how many pitches are thrown in each game and practice. Overuse injuries can be prevented by sticking to the pitch count guidelines.
Get enough rest: Resting your arm between pitching sessions is crucial. This gives your muscles and tendons time to recover and reduces the chance of injury.
Use ice and recover: After pitching, apply ice packs to your shoulder and elbow. This can help reduce inflammation and speed up recovery.
Get Enough Rest
Rest is key to recovery and preventing injuries. Make sure to take at least 1-2 days off between pitching appearances, with more rest needed as the number of pitches goes up. For 15-18-year-old pitchers, it’s advised to take at least 4 days off between appearances.
Also, ensure you get enough sleep and eat a balanced diet to aid in your overall recovery and performance. For more information on maintaining consistent performance, check out these top tips for preventing burnout.
Resting After the Season
Once the season is over, your arm needs time to rest. This rest period can help heal minor injuries and prevent serious long-term damage. Here are some steps to take for a good post-season rest:
Getting the Right Amount of Rest and Recovery
It’s important to take a break from pitching for a few weeks to give your arm time to heal. During this time, try low-impact activities like swimming or cycling to keep fit without putting too much pressure on your arm.
Training After the Season
After you’ve taken a break, start a conditioning regimen to gear up for the next season. This regimen should incorporate strength training, flexibility drills, and light throwing sessions to slowly regain arm strength and stamina.
Strength Training: Keep up with resistance band workouts, weightlifting, and plyometric drills to keep and build strength.
Flexibility Exercises: Add stretching and mobility work to keep the range of motion in your shoulder and elbow.
Light Throwing Sessions: Start with short, light throwing sessions and gradually increase the intensity and duration.
Keeping Long-Term Health
Keeping the long-term health of young players goes beyond just physical training. Proper nutrition and mental health are also important parts. Let’s look at how to take care of these parts:
How Nutrition Impacts Performance
What you eat can greatly impact how you play and recover from injuries. A well-balanced diet can give your body the fuel it needs and the nutrients necessary for repairing and growing muscles. Make sure to eat a variety of foods, including lean proteins, whole grains, fruits, and vegetables. For more tips on enhancing your game, check out these youth baseball throwing tips.
Drink Up
Keeping your body hydrated is key to performing at your best. Not drinking enough water can lead to tiredness and a lack of focus, which can negatively impact your pitching. It’s important to drink lots of water all day, particularly before, during, and after training sessions and matches.
How to Eat Healthily
Below are some suggestions for keeping your diet healthy:
Consume a Well-Rounded Diet: Each meal should include a balance of proteins, carbohydrates, and healthy fats.
Choose Healthy Snacks: Opt for nutritious snacks such as fruits, nuts, and yogurt to maintain your energy levels.
Limit Unhealthy Foods: Try to avoid sugary and processed foods as they can hinder your performance.
Emotional Well-being and Stress Management
Mental health is just as crucial as physical health. Effectively managing stress and maintaining a positive attitude can greatly affect your performance on the field. Here are some tips to help you remain mentally resilient:
Practice Mindfulness: Techniques like meditation and deep breathing can help reduce stress and improve focus.
Stay Positive: Focus on your strengths and achievements rather than dwelling on mistakes.
Talk to Someone: If you’re feeling overwhelmed, don’t hesitate to talk to a coach, parent, or counselor.
Balancing Academics and Sports
Balancing academics and sports can be challenging, but it’s essential for your overall development. Here are some tips to help you manage your time effectively:
Stick to a Routine: Make sure to set aside time for both schoolwork and practice in your daily routine.
Keep Everything in Check: Stay on top of assignments and deadlines to avoid cramming and stress.
Know What’s Important: Prioritize and tackle the most crucial tasks first.
Handling Stress and Expectations
Young athletes often deal with stress from coaches, parents, and even themselves. Knowing how to handle this stress is key to maintaining a positive mindset. Here are a few pointers:
Establish Achievable Goals: Rather than striving for perfection, focus on setting realistic goals.
Have Fun: Don’t forget to enjoy the game of baseball.
Lean on Your Support System: Rely on your family and friends for support and encouragement.
Commonly Asked Questions
When is the best age to start pitching?
The best age to start pitching can vary from player to player, but generally, kids can start learning the basic mechanics of pitching around age 8-10. It’s crucial to emphasize proper form and not to push too hard to prevent injuries.
What’s the recommended number of pitches for young players in a week?
To avoid overuse injuries, it’s important to follow pitch count guidelines. Here’s what’s recommended per week:
For 9-10 years old: 75-85 pitches
For 11-12 years old: 85-95 pitches
For 13-14 years old: 95-105 pitches
For 15-18 years old: 10-12 innings and no more than 86 pitches per game
What injuries are typical for pitchers and how can they be avoided?
Typical injuries for pitchers include:
Little League Elbow: This is a result of throwing too much. To prevent it, monitor how many pitches are thrown and make sure the mechanics are correct.
Rotator Cuff Injuries: These are caused by overuse. You can prevent them by doing strength training and flexibility exercises.
UCL Injuries: These are caused by putting too much stress on the elbow. To prevent them, follow the guidelines for how many pitches should be thrown and make sure to rest enough.
What can coaches do to help young players with pitching mechanics?
Coaches are very important for helping young pitchers develop. Here are some things they can do:
Teach a straight motion: Help pitchers develop a motion that helps them throw straight.
Protect the shoulder and elbow: Teach mechanics that protect the pitcher’s shoulder and elbow.
Simplify the delivery: Break down the delivery into steps that are easy to remember and repeat.
Use drills: Some drills that can help include:
Balance and posture drill: Helps pitchers improve their balance and posture, which are important for accuracy and consistent mechanics.
Target practice drill: Set up a small strike zone or target on a wall and have the pitcher aim for the same spot consistently. This helps train muscle memory and improve accuracy.

Leave a Reply